Using categories
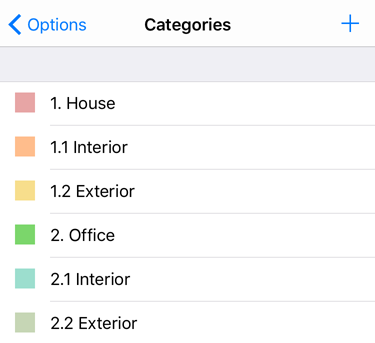
When you use TaskTask with Exchange or Office 365, TaskTask automatically downloads the categories you've defined in Outlook's category list. This includes the category name and color:

Changes made to the list of categories, and new categories created in TaskTask are not roamed back to your account but the individual categories assigned to a task are sent back to your account.
Creating a new category
For best results, new categories should be created in Outlook or Outlook Web App. New categories can be created in TaskTask however the category color will not be visible in Outlook.
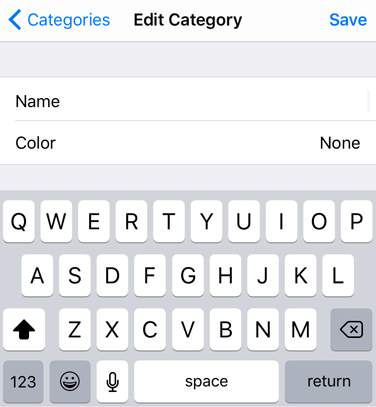
To create a new category tap the Action button from your task list, then select Options and then Categories. Tap the Plus (+) to create a new category and optionally assign a color.

Tap save when you have finished your edits. You can also add new categories while assign a category to a task.
Assigning categories to a task
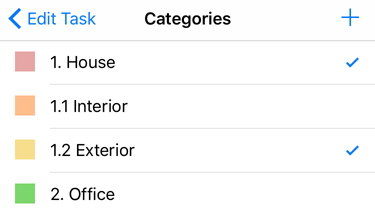
Categories help provide additional context for tasks in your task list. To assign a category, tap on the task to open the editor, and then tap on Categories. One or more categories can be applied to the task by tapping on the category so that a checkmark appears on the right of the category name.

When you have finished, tap < Edit Task to return to the task editor and save your changes.
Using categories
Once you have used categories to organize your tasks, you can use other features of TaskTask to help you out. For example, you can customize your view to group tasks by their categories instead of their due date. This works well for the "Getting things done" philosophy. See customizing the view for more details on grouping by category.
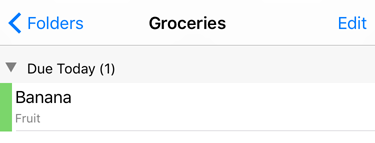
Categories appear in the task list with the category color (if selected) on the left of the task and the name of the selected categories in the details line (if enabled in the view options).

You can also search using a category name and find all matching tasks that have that category.